Month: March 2025

hoover carpet cleaner user manual

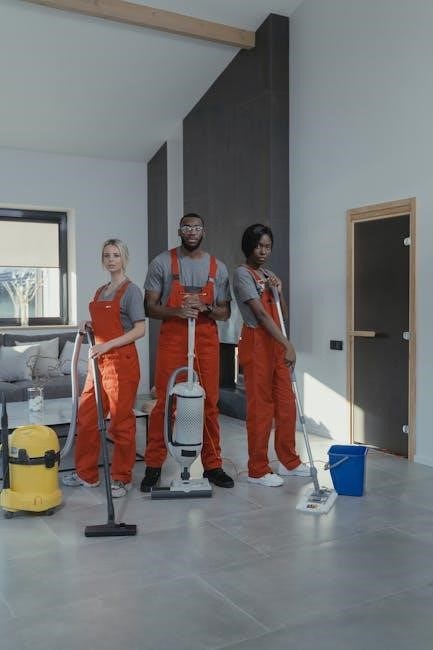
The Hoover Carpet Cleaner is a versatile cleaning solution designed for carpets, rugs, stairs, and upholstery. It effectively removes dirt, stains, and odors, enhancing the appearance of surfaces. Suitable for both quick cleanups and deep cleaning tasks, it offers practicality and efficiency for maintaining a clean home environment.

Safety Precautions

Always read the manual before use. Avoid wet surfaces and ensure ventilation. Use only Hoover-approved cleaning products. Keep out of reach of children and pets.

2.1 Important Safety Guidelines

Safety First: Always read the user manual thoroughly before operating your Hoover Carpet Cleaner. Ensure proper ventilation in the area and avoid using the cleaner on wet surfaces.
Use only cleaning solutions approved by Hoover to prevent damage or hazards. Keep the appliance out of reach of children and pets. Never use the cleaner as a traditional vacuum or for wet pickup. Follow all instructions carefully to ensure safe and effective cleaning.

2.2 Specific Warnings and Cautions

Assembly and Setup

This section provides a step-by-step guide to assembling and setting up your Hoover Carpet Cleaner. It covers unpacking, identifying components, and preparing the machine for first-time use.

3.1 Identifying Parts and Components

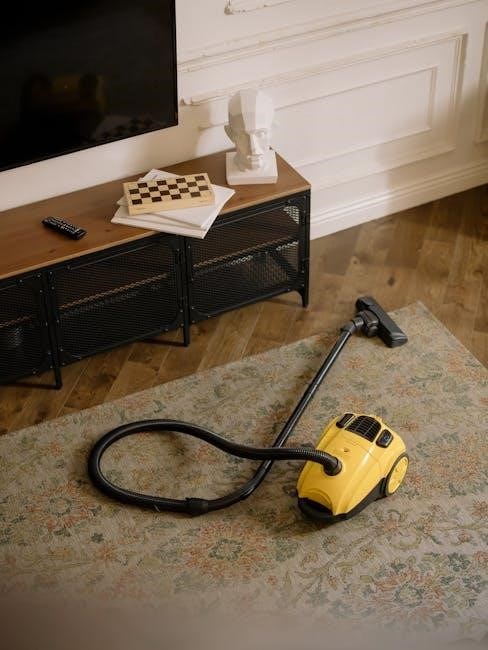
Before assembly, familiarize yourself with the key components of your Hoover Carpet Cleaner; These include the clean solution tank, dirty water tank, brushes, nozzle, and handle. The clean solution tank holds the cleaning mixture, while the dirty water tank collects soiled water. Brushes agitate the carpet fibers, and the nozzle directs cleaning solution and suction. Ensure all parts are included and undamaged before proceeding with setup. Proper identification ensures efficient assembly and operation.

3.2 Initial Setup and Preparation

Begin by assembling the Hoover Carpet Cleaner according to the instructions. Attach the handle securely and ensure all connections are tight. Next, fill the clean solution tank with water and add the recommended HOOVER cleaning solution. Avoid overfilling to prevent leaks. Place the dirty water tank in position and ensure it clicks into place. Finally, check that all brushes and nozzles are properly aligned. Always refer to the user manual for specific model instructions to ensure correct setup and safe operation.

Popular Hoover Carpet Cleaner Models

The Power Scrub Deluxe and SmartWash Automatic are top Hoover models. Both offer advanced cleaning features, easy operation, and excellent results for various carpet types and stains.

4.1 Power Scrub Deluxe

The Power Scrub Deluxe is a highly efficient model designed for deep carpet cleaning. It features multiple rotating brushes for thorough agitation and a large tank for extended cleaning sessions. This model is ideal for tackling tough stains and heavy foot traffic areas. With its robust design and user-friendly controls, it offers excellent performance for both maintenance cleaning and deep sanitizing. The Power Scrub Deluxe is a popular choice among homeowners seeking reliable and effective carpet care solutions.

4.2 SmartWash Automatic Carpet Cleaner

The SmartWash Automatic Carpet Cleaner offers advanced, hands-free cleaning with its automatic detergent dispensing and brush operation. Designed for ease of use, it ensures consistent cleaning results without manual effort. Its sleek design allows for easy maneuverability, making it ideal for various surfaces, including carpets and upholstery. The automatic features simplify the cleaning process, providing efficient and thorough results for maintaining a clean and fresh home environment.

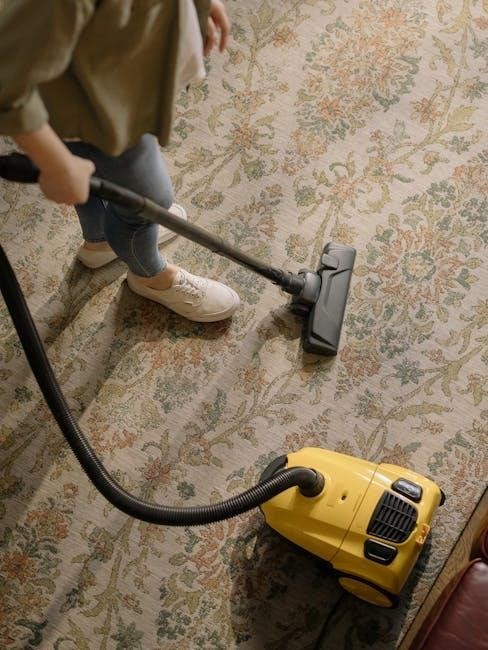
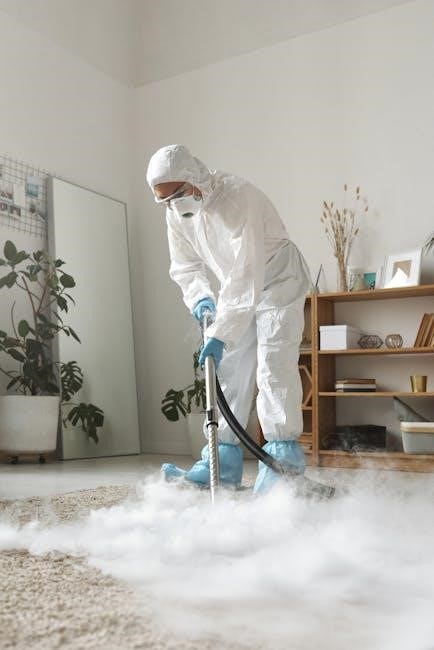
Using Your Hoover Carpet Cleaner

For effective cleaning, vacuum surfaces thoroughly before use. Follow manual instructions for proper operation, ensuring optimal results with Hoover cleaning solutions for stains and odors.

5.1 Before You Start: Pre-Cleaning Checks

Before using your Hoover Carpet Cleaner, vacuum the area thoroughly to remove loose debris. Ensure the upholstery fabric is marked with a W for wet cleaning. Check for any damage or stains that may require special attention. Fill the clean solution tank with Hoover-approved products and ensure all parts are securely assembled. Avoid using the cleaner on wet surfaces or as a traditional vacuum. Always refer to the user manual for specific model instructions to ensure safe and effective cleaning.

5.2 Cleaning Techniques and Best Practices

For optimal results, use Hoover-approved cleaning solutions and avoid over-saturating carpets. Clean in small, manageable sections, working in a consistent pattern. Use the forward push to wash and the backward pull to dry. Allow carpets to air-dry away from direct sunlight to prevent fading. Avoid walking on damp carpets until fully dry. For tough stains, apply solution, let it sit, and rinse thoroughly. Refer to your manual for model-specific guidance to ensure effective and safe cleaning.

Maintenance and Troubleshooting

Regularly clean filters and check for blockages to ensure optimal performance. Empty dirty water tanks after use and rinse thoroughly. Refer to the manual for troubleshooting common issues like poor suction or malfunctioning parts.

6.1 Routine Maintenance Tips

Regular maintenance ensures your Hoover Carpet Cleaner performs optimally. Clean or replace filters after each use to prevent clogs and maintain suction power. Empty and rinse the dirty water tank thoroughly to avoid mold and odors. Check and replace belts as needed, and ensure all connections are secure. Use only Hoover-approved cleaning solutions to prevent damage. After each use, leave the machine open to dry completely. Lubricate moving parts periodically and refer to the manual for specific maintenance schedules to prolong the cleaner’s lifespan and efficiency.

6.2 Common Issues and Solutions

Common issues with Hoover Carpet Cleaners include low suction power, the machine not turning on, or the cleaner not dispensing solution. For low suction, check and clean the filter or ensure the hose is not blocked. If the machine won’t start, verify power supply and ensure the switch is functioning. For solution dispensing issues, check for blockages in the tubes or tanks and ensure the solution tank is properly seated. Refer to the manual for troubleshooting guides and solutions to restore optimal performance and extend the cleaner’s lifespan.

Environmental Considerations

Using a Hoover Carpet Cleaner responsibly helps minimize environmental impact. Always use eco-friendly cleaning solutions and dispose of wastewater properly. Regular maintenance ensures efficient water and energy use. Avoid overusing cleaning agents to reduce chemical runoff. For optimal performance, follow guidelines for water usage and solution dilution. Proper disposal of used cleaning fluids and filters is essential to protect the environment. By adhering to these practices, you can maintain a clean home while promoting sustainability and reducing your ecological footprint.

Accessing the User Manual

Access the Hoover Carpet Cleaner user manual by visiting the official Hoover website or specific product links. Download the PDF manual and ensure you have Adobe Acrobat Reader installed for viewing.

8.1 Finding the Right Manual for Your Model

To find the correct user manual for your Hoover Carpet Cleaner, visit the official Hoover website or trusted manual databases. Use the search function by entering your specific model number or product code. For example, models like the Power Scrub Deluxe or SmartWash have dedicated manuals. Ensure the manual matches your device for accurate instructions. Once found, download the PDF and use Adobe Acrobat Reader to view it. This ensures you have the right guidance for your cleaner.

8.2 Downloading and Viewing the PDF Manual

Once you’ve identified the correct manual for your Hoover Carpet Cleaner model, click the download link to save the PDF file. Ensure you have Adobe Acrobat Reader installed to view the document. Open the PDF to access detailed instructions, safety guidelines, and troubleshooting tips specific to your cleaner. The manual is organized by sections, making it easy to navigate and find the information you need. Always refer to your model-specific manual for accurate guidance on operation and maintenance.

By following the guidelines in this manual, you can effectively use and maintain your Hoover Carpet Cleaner, ensuring optimal performance and longevity. Proper usage, regular maintenance, and adherence to safety precautions will help preserve your carpet’s appearance and extend the cleaner’s lifespan. Always refer to your model-specific manual for detailed instructions tailored to your device. With the right care and attention, your Hoover Carpet Cleaner will remain a reliable tool for keeping your home clean and fresh.

References

For comprehensive guidance, refer to the official HOOVER website and user manuals available for download. These resources provide detailed instructions for specific models, including the Power Scrub Deluxe and SmartWash. They cover safety precautions, maintenance tips, and troubleshooting. Websites like Manuals Brain and archive.org also host Hoover manuals, ensuring easy access. Consulting these references ensures optimal performance and helps users understand their cleaner’s features and proper effective usage.

gen z bible translation pdf

The Gen Z Bible Translation aims to present biblical text in modern, relatable language, making it accessible to younger audiences. Available as a free PDF, it bridges traditional scripture with contemporary culture, offering a fresh perspective for today’s youth while maintaining the core message of faith.

1.1 What is the Gen Z Bible Translation?

The Gen Z Bible Translation is a modern interpretation of biblical text, designed to resonate with younger audiences by using contemporary language and slang. It aims to bridge the gap between traditional scripture and the cultural vernacular of today’s youth. This translation is not a direct translation but rather a paraphrase, making it more relatable and accessible. It is available as a free PDF download, offering a fresh perspective on biblical teachings. The goal is to engage Gen Z with familiar phrases and expressions, ensuring the message remains relevant in a rapidly changing world. While it serves as an effective tool for outreach, it is not intended to replace traditional translations for in-depth theological study.

1.2 Purpose and Target Audience

The primary purpose of the Gen Z Bible Translation is to make biblical teachings accessible and relatable to younger generations. It targets teenagers, young adults, and individuals new to faith, offering a fresh perspective on scripture. By using modern language and slang, it aims to engage Gen Z, who may find traditional translations daunting. This translation is particularly useful for those seeking a culturally relevant introduction to Christianity; It serves as a tool for evangelism and outreach, helping to bridge the gap between traditional faith communities and secular or younger audiences. The Gen Z Bible Translation is not intended to replace traditional Bibles but to act as an entry point for spiritual exploration and dialogue.

Features and Language of the Gen Z Bible

The Gen Z Bible uses modern slang and casual language to make scripture relatable, bridging the gap between traditional biblical text and contemporary culture for younger audiences.

2.1 Modern Language and Slang

The Gen Z Bible incorporates current slang and colloquial expressions to resonate with younger readers. For instance, phrases like “vibe check” and “no cap” replace traditional biblical language, making the text feel more approachable. This modernization ensures that complex theological concepts are presented in a relatable manner, helping Gen Z connect with the Bible’s message without feeling disconnected by archaic terms. The use of everyday language also reflects how younger audiences communicate, making the scripture more engaging and easier to understand. This approach emphasizes clarity and relevance, aiming to spark interest and foster a deeper connection with the biblical narrative among contemporary youth.

2.2 Relatable Interpretation for Younger Audiences

The Gen Z Bible Translation prioritizes relatability, rephrasing biblical stories and teachings in ways that resonate with younger readers. By using modern-day scenarios and cultural references, it makes complex spiritual concepts more accessible. For example, parables are retold in settings familiar to Gen Z, such as social media or everyday teen life, helping them connect with the message on a personal level. This approach bridges the gap between ancient scripture and contemporary culture, encouraging engagement and fostering a deeper understanding of faith. The translation emphasizes accessibility over literal accuracy, ensuring that younger audiences can grasp the Bible’s relevance in their lives. This relatable interpretation aims to inspire spiritual curiosity and make the Bible feel less intimidating for those new to its teachings.

Accessibility of the Gen Z Bible Translation

The Gen Z Bible Translation is widely accessible, offering free PDF downloads and availability on digital platforms like YouVersion. It also engages audiences through social media, ensuring its message reaches a broad, tech-savvy audience.

3.1 Free PDF Download Options

The Gen Z Bible Translation is available for free download in PDF format, making it easily accessible to anyone with internet access. Users can find it on various Christian websites, digital libraries, and platforms that specialize in religious texts. This convenient option caters to tech-savvy Gen Z, who prefer digital content for easy reading and sharing. The PDF format ensures compatibility across devices, allowing readers to access the text on smartphones, tablets, or computers. Additionally, its availability online reduces barriers for those unfamiliar with traditional Bible sources. The free PDF download option has proven popular, especially among younger audiences seeking a modern, relatable interpretation of scripture. It’s a practical tool for personal study, group discussions, or evangelistic outreach, ensuring the message of the Bible remains relevant in today’s fast-paced, digitally driven world.

3.2 Availability on Digital Platforms

The Gen Z Bible Translation is widely available on various digital platforms, ensuring accessibility for tech-savvy younger audiences. Popular Bible apps like YouVersion offer the translation, allowing users to access it alongside other versions for comparison. The digital format includes features like adjustable fonts, night mode, and bookmarking, enhancing readability and convenience. Additionally, the translation can be found on social media platforms and websites dedicated to religious content. This widespread availability makes it easy for Gen Z to engage with the Bible in a format they are accustomed to using daily. The integration of the Gen Z Bible into these platforms highlights its role in modernizing how young people interact with scripture, blending tradition with contemporary technology seamlessly.

Criticisms and Limitations

The Gen Z Bible Translation is criticized for prioritizing modern language over theological depth, raising concerns about its suitability for serious study and fidelity to original texts.

4.1 Is the Gen Z Bible a Sin?

The question of whether the Gen Z Bible is a sin sparks debate. Critics argue its modern language and slang may dilute the original message, potentially misleading readers. However, supporters emphasize its role in making scripture accessible to younger generations. Many view it as a tool for outreach rather than a replacement for traditional translations. The Bible’s purpose is to connect people with God, and if the Gen Z Bible achieves this by bridging cultural gaps, it serves a noble cause. Ultimately, its value lies in its ability to engage modern audiences without compromising the core teachings of faith.

4.2 Limitations for Deep Theological Study

The Gen Z Bible Translation, while effective for outreach, has limitations for deep theological study. Its modern language and paraphrasing prioritize readability over precise theological nuance, making it less suitable for scholars or those seeking detailed doctrinal insights. Traditional translations like the KJV or ESV are often preferred for their faithfulness to the original texts. The Gen Z Bible sacrifices some depth to connect with younger audiences, making it a supplementary tool rather than a primary resource for serious biblical analysis. While it excels in accessibility, it may not fully capture the richness and complexity of the original scriptures, limiting its utility for advanced theological exploration;

Role in Evangelism and Outreach

The Gen Z Bible Translation serves as a powerful tool for modern evangelism, bridging the gap between traditional faith language and contemporary youth culture. Its relatable slang and modern phrasing make it an effective resource for outreach, helping to engage younger audiences who might otherwise find the Bible inaccessible. By offering a fresh perspective, it sparks conversations and fosters connections, particularly through viral platforms like TikTok, where creators retell biblical stories in Gen Z language, reaching hundreds of thousands of followers and inspiring spiritual discussions among a tech-savvy generation.

5.1 Effectiveness in Modern Evangelism

The Gen Z Bible Translation has proven effective in modern evangelism by making biblical messages relatable to younger audiences. Its use of contemporary slang and casual language resonates with Gen Z, who often find traditional biblical language inaccessible. This approach helps bridge the gap between ancient scripture and modern culture, facilitating spiritual engagement. Digital platforms, such as TikTok, have amplified its reach, with creators translating Bible stories into Gen Z lingo, gaining hundreds of thousands of followers. The translation serves as a tool to spark curiosity and initial faith discussions, particularly among those unfamiliar with Christian teachings. By presenting the gospel in a fresh, approachable way, the Gen Z Bible Translation has become a valuable asset for outreach and evangelism in the digital age.

5.2 Examples from Social Media and TikTok

Social media platforms, particularly TikTok, have become a hub for sharing the Gen Z Bible Translation, with creators using modern slang to retell Bible stories. A viral TikTok account, “Gen Z Bible Stories,” has gained significant traction by translating biblical narratives into relatable, casual language. For instance, stories like Creation and the Fall of Man are reimagined with phrases like “totally finished” and “you know,” making the content more approachable. These videos often go viral, sparking discussions and engaging younger audiences who might not typically interact with traditional religious content. Such efforts demonstrate how social media can serve as a powerful tool for spreading the Gen Z Bible’s message, blending faith with contemporary culture to resonate with today’s youth.

Cultural and Generational Impact

The Gen Z Bible Translation bridges the gap between traditional faith and modern culture, making biblical teachings relatable and accessible to younger generations through contemporary language.

6.1 Bridging the Gap with Contemporary Culture

The Gen Z Bible Translation effectively bridges the gap between traditional religious texts and modern culture by using language and slang familiar to younger audiences. This approach makes biblical teachings more relatable and accessible, especially for those who may find conventional translations archaic or difficult to understand. By integrating contemporary expressions, the Gen Z Bible resonates with a generation deeply connected to social media and informal communication. This cultural relevance helps young people engage with scripture in a way that feels natural and personal, fostering a connection to faith that might otherwise be lost. The translation’s focus on modern language ensures that timeless messages remain impactful in today’s fast-paced, tech-driven world.

6.2 The Future of Bible Translations for Gen Z

The future of Bible translations for Gen Z likely lies in continued innovation and adaptability. As technology advances, digital platforms will play a pivotal role in making scripture accessible. Free PDF downloads and interactive apps will remain popular, offering convenience and engagement. Translations like the Gen Z Bible demonstrate a shift toward more relatable language, ensuring that young people can connect with biblical teachings on their terms. While traditional translations hold value, modern paraphrases will likely gain prominence as tools for outreach and personal study. This evolution ensures that the Bible remains relevant, speaking to each new generation in a way that resonates with their unique experiences and cultural context.

inductive bible study symbols pdf

Inductive Bible study symbols are essential tools for marking and interpreting Scripture, helping you engage deeply with God’s Word. Download free PDF guides to enhance your study.

Understanding the Inductive Bible Study Method

The inductive Bible study method is a systematic approach to understanding Scripture by observing, interpreting, and applying its teachings. It emphasizes personal engagement with the text, encouraging believers to uncover its meaning through direct observation rather than relying on external interpretations. This method fosters a deeper connection with God’s Word, allowing individuals to discover truths firsthand. By focusing on context, key themes, and practical application, inductive study equips learners to interpret Scripture accurately and apply its principles to their lives effectively.

Importance of Using Symbols in Bible Study

Using symbols in Bible study is a powerful tool for engaging with Scripture. Symbols help mark key words, themes, and concepts, making observations clearer and more organized. They enable visual learners to connect with the text on a deeper level, enhancing retention and recall of biblical truths. Symbols also provide a quick reference system, allowing you to track patterns and relationships within the text. By creating a consistent system of symbols, you can tailor your study to focus on specific elements, such as promises, commands, or questions, making your study more effective and meaningful. Free PDF guides offer predefined symbols to get you started.

Key Symbols Used in Inductive Bible Study

Common symbols include underlining, circling, and highlighting to mark key words, themes, and concepts, aiding in identifying patterns and relationships in Scripture.

Common Bible Marking Symbols and Their Meanings

Common symbols in inductive Bible study include underlining for key verses, circling for unfamiliar terms, and highlighting to emphasize themes. Arrows connect related concepts, while asterisks mark important truths. Colors differentiate themes, such as red for God’s promises and green for spiritual growth. These symbols help visualize relationships and patterns, aiding deeper comprehension. Many resources, like Precept Ministries, offer downloadable PDF guides with standardized symbols to enhance your study. Using these tools fosters engagement and clarity, making Scripture more accessible and meaningful.

Specialized Symbols for Key Concepts (e.g., Promises, Commands, Questions)

Specialized symbols enhance inductive Bible study by highlighting key concepts. A crown symbolizes God’s promises, while an arrow indicates commands or actions. Question marks denote inquiries or unclear passages. Checkmarks identify truths or affirmations, and an “X” marks contradictions or warnings. Dots can represent prayers or praises, and wavy lines may signify spiritual themes. These symbols help categorize and connect ideas, making interpretation clearer. Resources like Kay Arthur’s studies and Keri Dent’s guides provide adaptable symbols, ensuring deeper engagement with Scripture and facilitating organized, meaningful analysis.

How to Create Your Own Inductive Study Symbols

Creating personalized inductive study symbols allows for a tailored approach to Bible study. Start by identifying key concepts you frequently encounter, such as promises, commands, or questions. Assign unique marks like underlining, circling, or specific doodles to each category. Use colors to differentiate themes; Keep your system simple and consistent, ensuring each symbol is easily recognizable. Experiment on a sample passage to refine your design. For clarity, create a legend to reference your symbols. This method ensures your study is both meaningful and visually engaging, helping you connect deeply with Scripture.

The Steps of Inductive Bible Study

Inductive Bible study involves three systematic steps: observation, interpretation, and application. These steps guide believers to deeply engage with Scripture, uncover its meaning, and apply its truths personally.

Step 1: Observation – Marking and Noting Key Details

Observation is the foundational step in inductive Bible study, requiring careful reading and noting of key details. Use symbols to mark important elements like names, places, and themes. For example, circle names for people, underline key verses, or use arrows to show relationships. Highlight repeated words or phrases to uncover patterns. This step helps you engage visually with the text, making it easier to identify significant concepts and prepare for deeper interpretation. Consistent use of symbols enhances your ability to track themes and ideas across passages.

Step 2: Interpretation – Understanding the Meaning of the Text

After observing key details, interpretation involves understanding the text’s meaning by connecting observations to context. Use symbols to highlight relationships between ideas, such as question marks for unclear verses or stars for key insights. Analyze repeated themes, literary structures, and theological concepts. This step requires asking questions like, “What does this mean?” and “Why is this significant?” Symbols help uncover the author’s intent and deeper truths, guiding you to an accurate and meaningful interpretation of Scripture.

Step 3: Application – Applying Truth to Everyday Life

Application is the final step, where you bridge Scripture and real life. After interpreting the text, ask, “How does this apply to me?” Use symbols like a heart for convicting verses or an arrow for action steps. Reflect on how God’s truth can transform your thoughts, attitudes, and actions. Prayerfully consider specific ways to obey or respond to the text. This step makes Bible study practical, enabling you to live out God’s Word in everyday situations. Downloadable PDF guides often include sections for recording personal applications, helping you integrate spiritual truths into your life.

Benefits of Using Inductive Bible Study Symbols

Inductive Bible study symbols enhance engagement, improve retention, and provide a clear visual framework for understanding Scripture, making spiritual truths more accessible and memorable in daily life.

Enhanced Engagement with Scripture

Inductive Bible study symbols fostering deeper engagement by making Scripture study interactive and personal. These visual tools help highlight key verses, emotions, and themes, creating a vivid connection to the text. By actively marking and interpreting, believers engage more intentionally, leading to a richer spiritual experience. Symbols like underlining, circles, or stars transform passive reading into dynamic exploration, helping to uncover deeper meanings and applications. This method encourages a more immersive and meaningful interaction with God’s Word, fostering a lifelong love for Scripture and its life-changing truths.

Improved Retention and Recall of Biblical Truths

Inductive Bible study symbols significantly enhance retention and recall of biblical truths by providing visual markers for key concepts. These symbols, such as underlining, circles, or arrows, help learners focus on important verses and themes, reinforcing memory through active engagement. The process of marking and revisiting these symbols encourages deeper reflection, making it easier to remember and apply biblical teachings. Over time, this method builds a mental framework of Scripture, fostering long-term retention and recall of God’s Word for practical application in daily life.

Resources for Inductive Bible Study Symbols

Discover free PDF guides and worksheets for inductive Bible study symbols from ministries like Precept Ministries and Keri Dent, enhancing your study with practical tools.

Free PDF Worksheets and Guides Available Online

Enhance your inductive Bible study with free PDF worksheets and guides available online. These resources, often provided by ministries like Precept Ministries and Keri Dent, include printable key word symbol sheets, observation charts, and self-study workbooks for various books of the Bible. Designed to streamline your study process, these tools offer structured formats for recording observations, interpretations, and applications. They also include space for personal paraphrasing and reflection, making it easier to engage deeply with Scripture. Download these PDFs to create a organized and impactful study experience tailored to your needs.

Recommended Tools and Ministries (e.g., Precept Ministries, Keri Dent)

Precept Ministries and Keri Dent are renowned for providing exceptional resources for inductive Bible study. Their tools, including printable PDFs, key word symbol sheets, and in-depth workbooks, are designed to guide you in effectively marking and interpreting Scripture. These ministries offer structured guides for observations, interpretations, and applications, helping you deepen your understanding of God’s Word. Their resources are widely recommended for both individual and group studies, ensuring a comprehensive and organized approach to inductive Bible study. Visit their websites to explore their extensive library of study aids.

Tips for Effective Use of Inductive Study Symbols

Use symbols consistently, create a legend for reference, and review regularly to ensure clarity. This approach enhances engagement, retention, and personal connection with Scripture.

Best Practices for Marking Your Bible

When marking your Bible, consistency is key—use a specific symbol for recurring themes like promises or commands. Start with simple marks and gradually add complexity. Always keep a legend or key to reference your symbols, ensuring clarity. Highlight key verses or concepts that stand out, and use colors to differentiate themes. Regularly review your markings to reinforce learning and deepen understanding. Avoid overcrowding the text, and focus on what resonates most with your study. This intentional approach will make your Bible a personalized resource for spiritual growth.

How to Organize Your Symbols for Maximum Impact

Organizing your symbols effectively enhances your Bible study experience. Start by creating a consistent legend or key to define each symbol, ensuring easy reference. Group similar symbols (e.g., promises, commands) into categories for quick identification. Use a separate section in your notebook or digital tool to catalog your symbols, making them easily accessible. Incorporate color coding to differentiate themes or books of the Bible. Finally, periodically review and update your system to reflect your spiritual growth and deeper understanding of Scripture.

world history and geography modern times textbook pdf

World History and Geography: Modern Times explores the Renaissance to the present‚ integrating primary sources‚ maps‚ and digital tools to develop critical thinking and historical understanding.

1.1 Overview of the Textbook

World History and Geography: Modern Times offers a comprehensive exploration of global history from the Renaissance through the modern era. Built on the principles of Understanding by Design‚ this textbook emphasizes critical thinking‚ analysis‚ and the development of essential skills. It features a streamlined format‚ integrating primary and secondary sources‚ timelines‚ maps‚ and multimedia resources to engage students. Key periods include the Renaissance‚ the Age of Exploration‚ and the Cold War‚ providing a detailed understanding of historical events and their global impact. The textbook is designed to be accessible‚ with both print and digital versions available‚ including PDF formats for convenience. Digital supplements‚ such as videos and interactive tools‚ further enhance the learning experience‚ making it a versatile resource for modern education.

Structure of the Textbook

World History and Geography: Modern Times is organized chronologically‚ covering key periods from the Renaissance through the modern era‚ with integrated print and digital resources for enhanced learning.

2.1 Chronological Organization

World History and Geography: Modern Times is structured chronologically‚ beginning with the Renaissance and extending through the modern era. This approach allows students to trace historical developments seamlessly. Each chapter builds on the previous one‚ ensuring a logical flow of events. The textbook starts with the Renaissance in Europe‚ followed by the Reformation‚ the Age of Exploration‚ and progresses through significant global events. This timeline-based organization helps students understand cause-and-effect relationships and the evolution of ideas over time. The chronological arrangement also aligns with standard historical pedagogy‚ making it easier for educators to integrate the material into their curriculum. By following this sequence‚ students gain a comprehensive understanding of how historical events have shaped the contemporary world.

2.2 Key Periods Covered

World History and Geography: Modern Times encompasses pivotal eras‚ including the Renaissance‚ Reformation‚ and Age of Exploration. These periods highlight cultural‚ religious‚ and scientific transformations. The textbook also delves into the Cold War‚ examining its global impact and legacy. By focusing on these key periods‚ the text provides a balanced view of historical development‚ enabling students to grasp the complexity of modern times. Each era is explored in depth‚ with primary sources and visuals that enhance understanding. This approach ensures that learners appreciate how past events have influenced current global dynamics and challenges. The inclusion of these periods aligns with educational standards‚ making the textbook a comprehensive resource for studying world history and geography.

Key Chapters and Their Significance

Key chapters in World History and Geography: Modern Times focus on transformative events like the Renaissance‚ Age of Exploration‚ and Cold War‚ offering insights into their enduring global influence and significance.

3.1 The Renaissance in Europe

The Renaissance in Europe‚ spanning from the 14th to the 17th century‚ marked a cultural and intellectual revival. It was characterized by advancements in art‚ science‚ and philosophy‚ with figures like Leonardo da Vinci and Michelangelo leading the way. This period saw the emergence of humanism‚ which emphasized human potential and individualism. The Renaissance also witnessed significant political changes‚ with city-states like Florence and Venice playing pivotal roles. The printing press‚ invented by Gutenberg‚ revolutionized the spread of knowledge‚ making books more accessible and contributing to a more educated population. This chapter highlights how the Renaissance laid the groundwork for modern Western society‚ fostering innovation and critical thinking that continues to influence contemporary culture and values. The textbook provides detailed analysis of key events‚ personalities‚ and their lasting impact on global history.

3.2 The Age of Exploration

The Age of Exploration‚ spanning the 15th to 17th centuries‚ was a pivotal era marked by European nations venturing beyond their borders to explore and map the globe. Driven by the quest for new trade routes‚ resources‚ and the spread of Christianity‚ explorers like Christopher Columbus and Vasco da Gama embarked on perilous journeys. This period saw the discovery of the Americas‚ the establishment of colonies‚ and the exchange of goods‚ cultures‚ and ideas between distant lands. However‚ it also led to conflicts with indigenous populations and the unintended spread of diseases. The textbook delves into the motivations behind these expeditions‚ the challenges faced by explorers‚ and the profound impact of their discoveries on global history. This chapter provides a comprehensive overview of how the Age of Exploration reshaped the world‚ fostering both opportunity and conflict that continue to influence modern times.

3.3 The Cold War and Its Impact

The Cold War‚ spanning from the late 1940s to the early 1990s‚ was a defining period of political tension and ideological conflict primarily between the United States and the Soviet Union. This era was characterized by proxy wars‚ espionage‚ and a nuclear arms race‚ which shaped global geopolitics. The textbook examines key events such as the Cuban Missile Crisis‚ the Korean and Vietnam Wars‚ and the Berlin Wall‚ highlighting their significance in understanding the broader struggle between capitalism and communism. The impact of the Cold War extended beyond politics‚ influencing culture‚ technology‚ and international relations. It also led to the rise of the United States and the Soviet Union as superpowers‚ while fostering alliances and divisions worldwide. This chapter provides a detailed analysis of how the Cold War’s legacy continues to affect contemporary global dynamics and international security.

Digital Resources and Accessibility

The World History and Geography: Modern Times textbook is available in PDF format‚ offering convenient access to its comprehensive content. Online supplements‚ including timelines‚ maps‚ and videos‚ further enhance learning experiences.

4.1 Availability of PDF Versions

The World History and Geography: Modern Times textbook is widely available in PDF format‚ offering students and educators easy access to its comprehensive content. These digital versions can be downloaded from platforms like the Internet Archive and McGraw Hill’s official website. The PDF versions are optimized for readability‚ featuring clear layouts and interactive elements such as hyperlinked tables of contents. Chapters are organized chronologically‚ covering periods from the Renaissance to the modern era. The digital format ensures portability‚ allowing learners to study on multiple devices. Additionally‚ the PDF files are often accompanied by supplementary materials‚ including maps‚ timelines‚ and primary sources‚ which enrich the learning experience. This accessibility makes the textbook a versatile resource for both classroom and independent study.

4.2 Online Supplements and Materials

Online supplements for World History and Geography: Modern Times enhance learning through interactive and multimedia resources. McGraw Hill’s digital platform offers a suite of tools‚ including interactive maps‚ timelines‚ and primary source documents‚ which provide deeper insights into historical events. Videos and audio narratives bring key concepts to life‚ while downloadable worksheets and study guides support independent practice. Educators benefit from customizable lesson plans‚ presentation slides‚ and assessment materials. These resources are seamlessly integrated with the textbook content‚ ensuring a cohesive learning experience. Additionally‚ the online platform allows for easy access to updated materials‚ reflecting the latest developments in historical research and teaching methodologies. This comprehensive suite of digital supplements makes the program adaptable to various teaching styles and student needs‚ fostering engagement and academic success.

Educational Significance and Impact

World History and Geography: Modern Times is a comprehensive curriculum that fosters critical thinking‚ analysis‚ and cultural understanding through diverse primary and secondary sources‚ enhancing student engagement and academic achievement.

5.1 Integration into Curriculum

World History and Geography: Modern Times seamlessly integrates into high school curricula‚ aligning with educational standards and promoting interdisciplinary learning. The textbook‚ designed around Understanding by Design principles‚ offers a structured yet flexible framework that supports diverse teaching methods. Teachers can incorporate primary sources‚ maps‚ and digital tools to enrich lessons‚ while the streamlined content ensures alignment with core history standards. The program’s integration of print and digital resources creates a cohesive learning experience‚ catering to technology-savvy students. Additional teaching tools‚ such as online supplements and presentations‚ provide educators with adaptable materials for lesson planning. This curriculum not only enhances student engagement but also prepares learners for critical analysis and global understanding‚ making it a valuable addition to modern educational frameworks.

5.2 Teaching Methods and Tools

The textbook World History and Geography: Modern Times offers a variety of teaching methods and tools to enhance student engagement and understanding. Primary sources‚ maps‚ and digital resources provide hands-on learning experiences‚ while interactive activities encourage critical thinking. Teachers can utilize timelines‚ simulations‚ and multimedia presentations to make history relatable. The program includes PDF versions‚ PowerPoint presentations‚ and online supplements‚ catering to diverse learning styles. Educators can access lesson plans‚ assessments‚ and customizable materials to adapt instruction to their classroom needs. These tools promote active participation and deeper comprehension of historical events‚ making the learning process dynamic and inclusive for all students.

The Relevance of Modern Times in Today’s World

Understanding Modern Times helps connect historical patterns to current global challenges‚ fostering critical thinking and informed decision-making in today’s interconnected world.

6.1 Connecting Past to Present

By examining historical events from the Renaissance onward‚ World History and Geography: Modern Times enables students to trace the origins of contemporary issues‚ such as globalization and political ideologies; The textbook emphasizes how past developments‚ like the Age of Exploration and the Cold War‚ have shaped modern economies‚ cultures‚ and international relations. Through primary sources and case studies‚ students gain insights into the evolution of societal structures and technological advancements. This connection fosters a deeper understanding of global challenges‚ encouraging learners to apply historical lessons to present-day problems. The integration of digital resources further enhances this learning experience‚ providing interactive tools that bridge the gap between past and present.

the bible timeline chart pdf

A Bible timeline chart PDF provides a visual framework for understanding the chronological sequence of biblical events‚ from Creation to the New Testament. It organizes key events‚ figures‚ and historical eras‚ offering a comprehensive overview that connects the dots of Scripture.
This tool enhances Bible study by making complex historical information accessible and engaging‚ allowing deeper insight into God’s plan and the unfolding narrative of salvation.

Overview of Bible Timeline Charts

A Bible timeline chart PDF is a visual tool that outlines the chronological order of biblical events‚ spanning from Creation to the New Testament. It organizes key events‚ historical eras‚ and significant figures‚ providing clarity and context to the Bible’s narrative. Available for free download‚ these charts are often printable and designed for personal study or educational use. They include detailed eras like the Persian‚ Greek‚ and Roman Empires‚ aligning biblical history with world events. Such charts enrich Bible study‚ making complex timelines accessible and engaging for learners of all ages.

Importance of Visualizing Biblical History

Visualizing biblical history through a timeline chart PDF enhances understanding of the Bible’s grand narrative. It connects events‚ revealing how they unfold chronologically and thematically. This visual framework helps learners grasp the relationships between key figures‚ events‚ and eras‚ such as Creation‚ the rise of nations‚ and the life of Jesus. By seeing the bigger picture‚ believers can deepen their faith and appreciate the coherence of Scripture. Timeline charts are invaluable for personal study‚ teaching‚ and engaging with God’s story in a structured and meaningful way‚ making biblical history accessible to all ages.

How to Download the Jeff Cavins Bible Timeline Chart PDF

Visit the official page‚ scroll down‚ and click the Download Bible Timeline Chart button. Select PDF format and save the file to your device.

Step-by-Step Download Process

To download the Jeff Cavins Bible Timeline Chart PDF‚ visit the official website and navigate to the designated download page. Scroll down to locate the Download Bible Timeline Chart button. Click on it to access the PDF option. Select the PDF format and choose a location to save the file. Once downloaded‚ the chart can be printed or used digitally for personal or group study. This resource is often available for free‚ making it easily accessible for enhancing your biblical understanding.

Free Resources and Availability

The Bible Timeline Chart PDF is widely available as a free resource‚ offering a comprehensive guide to biblical history. Many websites provide direct downloads‚ often requiring only an email sign-up for access. Some platforms offer additional materials‚ such as maps and study guides‚ to enhance your learning experience. The PDF is designed to be printable‚ making it easy to use for personal study or group discussions. Its availability ensures that anyone can explore the chronological narrative of Scripture without cost‚ fostering deeper engagement with biblical truths.

Historical Structure of the Bible Timeline

The Bible timeline chart PDF outlines major events from Creation to the New Testament‚ highlighting key moments like the Exodus‚ Kingdom of Israel‚ and life of Jesus Christ.

Major Events from Creation to the New Testament

The Bible timeline chart PDF chronologically outlines pivotal events‚ beginning with Creation (Genesis 1-2) and the Fall of Man. It highlights the Flood‚ Abraham’s call‚ Moses leading the Exodus‚ and the conquest of Canaan. The timeline traces the rise and fall of the Kingdoms of Israel and Judah‚ the Babylonian exile‚ and the return to Jerusalem. Key events include the birth‚ ministry‚ crucifixion‚ and resurrection of Jesus Christ‚ followed by the spread of Christianity in the New Testament. This structured overview provides clarity to the biblical narrative.

Key Figures and Their Roles in Biblical History

The Bible timeline chart PDF emphasizes the roles of key figures who shaped biblical history. Adam represents humanity’s start‚ while Abraham is the patriarch of faith. Moses leads Israel’s deliverance‚ and David establishes the kingdom. Jesus Christ‚ the Messiah‚ is central to salvation‚ and Paul spreads Christianity globally. These figures‚ along with prophets and apostles‚ illustrate God’s plan across generations‚ making the timeline a vital tool for understanding their contributions to the biblical narrative and their enduring impact on faith.

Understanding the Chronological Order

The Bible timeline chart PDF presents events from Creation to the New Testament in chronological order‚ clarifying the progression of God’s plan and historical connections.

Dividing the Timeline into Historical Eras

The Bible timeline chart PDF organizes events into distinct historical eras‚ such as Creation‚ the Old Testament period‚ the Intertestamental era‚ and the New Testament age. These divisions help readers understand the context of key events and their progression over time. By categorizing history into eras‚ the timeline highlights major transitions‚ such as the rise and fall of empires‚ the giving of the Law‚ and the life of Jesus Christ. This structure simplifies comprehension and connects events to their broader biblical significance.

Aligning Biblical Events with Historical Records

The Bible timeline chart PDF aligns biblical events with historical records‚ providing a coherent narrative. Key events‚ such as Creation (4000 BC)‚ Abraham’s birth (2165 BC)‚ and Joseph’s move to Egypt (1876 BC)‚ are placed alongside historical periods like the Persian‚ Greek‚ and Roman Empires. This alignment helps integrate biblical history with secular records‚ offering a fuller understanding of the events’ context. By connecting biblical narratives to verifiable historical data‚ the timeline enhances the study of Scripture and its place within world history.

Visualizing the Bible Timeline

A Bible timeline chart PDF offers a visual framework for understanding biblical history‚ using colors and symbols to highlight key events and periods‚ enhancing comprehension and study.

Design and Layout of the Timeline Chart

The Bible timeline chart PDF is thoughtfully designed with a clear‚ linear layout that visually organizes biblical history. It uses vibrant colors and distinct symbols to differentiate historical eras‚ key events‚ and important figures. Sidebars and annotations provide additional context‚ enhancing understanding. The chart is scalable‚ suitable for printing on standard paper or displaying digitally. Its intuitive structure makes it easy to follow the chronological flow of Scripture‚ ensuring a visually engaging and informative tool for Bible study and teaching. This design ensures clarity and accessibility for learners of all ages.

Using Colors and Symbols for Better Understanding

The Bible timeline chart PDF effectively utilizes colors and symbols to enhance comprehension. Distinct colors represent different historical eras‚ such as the Patriarchs‚ Kingdoms‚ or New Testament periods‚ making it easy to distinguish time frames. Symbols denote specific events‚ key figures‚ or themes‚ providing quick visual cues. This visual approach simplifies complex information‚ allowing users to grasp relationships between events and people. The use of colors and symbols ensures the timeline is engaging‚ accessible‚ and effective for both individual study and group discussions‚ catering to diverse learning styles and needs.

Educational and Study Applications

The Bible timeline chart PDF is a versatile tool for enhancing Bible study and education. It helps organize events chronologically‚ making it ideal for structured learning and teaching.

Using the Timeline for Bible Study Groups

The Bible timeline chart PDF is an invaluable resource for Bible study groups‚ providing a clear visual guide to biblical events. It helps participants visualize the sequence of key events‚ aligning Scripture with historical context. Leaders can use it to structure discussions‚ ensuring a cohesive understanding of God’s plan. The chart’s chronological layout aids in tracing the progression of major themes and covenantal relationships. It also highlights the roles of pivotal figures‚ fostering deeper engagement and insights during group sessions. Its simplicity makes it accessible for all participants‚ enhancing collaborative learning and spiritual growth.

Teaching Biblical History to Children

The Bible timeline chart PDF is a powerful tool for teaching biblical history to children‚ offering a visually engaging way to explore God’s story. Its clear‚ chronological layout helps kids grasp the sequence of events‚ from Creation to the New Testament. The chart’s simplicity and use of colors and symbols make complex historical information accessible and fun for young learners. It can be printed and used in interactive activities‚ such as matching events or placing stickers‚ to create a hands-on learning experience that brings the Bible to life for children.

Additional Resources and Tools

Bible timeline charts are enhanced with maps and charts that provide geographical and historical context‚ offering a deeper understanding of biblical events and their significance.

Maps and Charts to Complement the Timeline

Maps and charts are essential companions to the Bible timeline chart PDF‚ offering a visual representation of biblical geography and historical contexts. Historical maps highlight the Holy Land‚ journeys of key figures like Paul‚ and empires mentioned in Scripture. Charts break down periods‚ such as the Old Testament divide or the life of Jesus‚ providing clarity. Together‚ these resources enhance understanding by connecting events to their geographical and chronological settings‚ making the Bible’s narrative more accessible and engaging for study and teaching purposes.

Interactive Digital Versions of the Timeline

Interactive digital versions of the Bible timeline offer engaging and dynamic ways to explore biblical history. These tools allow users to zoom in on specific eras‚ click on events for details‚ and navigate seamlessly through the narrative. Digital timelines often include clickable maps‚ key figure profiles‚ and scriptural references‚ making study immersive and convenient. Available as apps or online resources‚ they cater to modern learners‚ providing an accessible and user-friendly experience for personal study or educational settings‚ enhancing the understanding of God’s unfolding story.

Practical Uses of the Bible Timeline Chart

The Bible Timeline Chart is a versatile tool for personal Bible study‚ teaching‚ and lesson planning. It helps organize events chronologically‚ making it easier to prepare engaging religious lessons and activities.

Enhancing Personal Bible Study

A Bible Timeline Chart serves as a powerful tool for deepenening personal study by visually connecting events across Scripture. It helps identify key moments‚ align Old and New Testament narratives‚ and understand the flow of God’s plan. By referencing the timeline‚ readers can contextualize stories‚ see relationships between events‚ and grasp the broader biblical narrative. This visual aid makes complex historical information accessible‚ fostering a richer‚ more informed engagement with the Bible and its teachings.

Preparing Lessons for Religious Education

A Bible Timeline Chart PDF is invaluable for religious educators‚ providing a clear‚ organized framework for lesson planning. It visually arranges events‚ helping students grasp the chronology of biblical history. Educators can use the timeline to highlight key events‚ align Scripture with historical context‚ and create engaging‚ structured lessons. The chart also serves as a visual aid‚ making complex narratives accessible to learners of all ages‚ fostering a deeper understanding of the Bible’s message and its relevance in today’s world.

A Bible Timeline Chart PDF is a powerful tool for deepening faith and understanding. It provides a clear‚ organized framework for exploring biblical history‚ enhancing personal and communal study.

The Significance of a Bible Timeline Chart

A Bible Timeline Chart PDF is a vital tool for understanding the chronological flow of Scripture. It visually organizes key events‚ figures‚ and eras‚ making the Bible’s narrative more accessible.
By providing a clear framework‚ it helps connect the dots between Old and New Testament events‚ revealing God’s overarching plan. This resource is invaluable for both personal study and group discussions‚ enhancing comprehension and fostering a deeper appreciation of biblical history and its relevance to faith.

Encouraging Deeper Engagement with Scripture

A Bible Timeline Chart PDF fosters a deeper connection with Scripture by visually organizing its narrative. It highlights key events‚ eras‚ and figures‚ making the Bible’s story more relatable.
By seeing the chronological flow‚ believers can better grasp God’s plan and appreciate the unity of Old and New Testament teachings. This tool inspires meaningful reflection‚ prayer‚ and study‚ helping individuals and groups engage more profoundly with the Word of God and its life-changing message.

willie’s icehouse nutrition information pdf free download

Willies Icehouse provides transparent nutrition information, ensuring customers can make informed dining choices. Their free downloadable PDF details calories, macronutrients, and allergens, aiding meal planning and dietary accommodations.

1.1 Overview of Willies Icehouse Menu and Nutrition Transparency

Willies Icehouse offers a transparent approach to nutrition, providing a free downloadable PDF guide. This resource outlines detailed nutrition information, including calories, protein, fat, carbs, and allergens for each menu item. The guide empowers customers to make informed decisions, aligning with their dietary preferences and health goals while maintaining the quality and flavor of their meals.

1.2 Importance of Understanding Nutrition Facts for Informed Dining

Understanding nutrition facts is crucial for making informed dining choices. At Willies Icehouse, the free PDF guide helps patrons align their meals with health goals, manage dietary restrictions, and balance indulgence with awareness. This transparency ensures customers can savor their favorite dishes while maintaining nutritional consciousness and making decisions that suit their lifestyle and preferences effectively.

Popular Menu Items and Their Nutritional Breakdown

The Chicken Willie Sandwich offers 1219 calories, 44g of protein, and 13g of fat, while the Icehouse Queso with ground beef provides 1266 calories, 62g of fat, and 50g of protein. Loaded Fries add 574 calories, 34g of fat, and 6g of protein, making these items popular yet calorie-dense choices for diners.

2.1 Chicken Willie Sandwich: Calories, Protein, and Fat Content

The Chicken Willie Sandwich is a hearty option, offering 1219 calories, 44g of protein, and 13g of fat. With 215mg of cholesterol, it provides a substantial meal for diners seeking a protein-rich choice. This sandwich is a popular pick for its flavor and nutritional balance, making it a satisfying option for those looking to meet their daily protein goals without excessive fat content.

2.2 Icehouse Queso and Loaded Fries: Nutritional Facts and Allergen Info

The Icehouse Queso contains 1266 calories, 62g of fat, and 180mg of cholesterol, while Loaded Fries have 574 calories, 34g of fat, and 58mg of cholesterol. Both items are high in calories and fat, making them indulgent choices. They contain dairy and gluten, posing allergen concerns. Patrons with dietary restrictions should exercise caution due to potential cross-contamination during preparation.

Allergen Information and Dietary Restrictions

Willies Icehouse identifies common allergens like gluten, dairy, and nuts in their menu. The nutrition PDF helps guests with dietary restrictions make safe, informed choices.

3.1 Gluten-Free Options and Accommodations at Willies Icehouse

Willies Icehouse offers gluten-free options, accommodating guests with dietary needs. While they don’t have a dedicated gluten-free menu, they prepare some items without gluten. The nutrition PDF outlines these options, ensuring safe choices. However, cross-contamination risks exist, so communication with staff is advised for severe allergies.

3.2 Downloading the Allergen Information PDF for Safe Dining

Willies Icehouse provides a free downloadable allergen information PDF, ensuring safe dining for all guests. This comprehensive guide details allergens present in each menu item, helping customers with dietary restrictions make informed choices. It’s easily accessible online, promoting transparency and safety for those managing allergies or preferences.

Calorie and Macronutrient Breakdown for Key Dishes

Willies Icehouse offers a range of dishes with varying calorie and macronutrient content. High-calorie items like wings and nachos provide indulgent options, while lower-calorie choices such as salads cater to health-conscious diners, ensuring a balanced menu for all preferences.

4.1 High-Calorie Items: Wings, Nachos, and Fried Pickles

Willies Icehouse offers indulgent high-calorie options like wings, nachos, and fried pickles. Wings range from 6 to 12 pieces, with options like buffalo or BBQ, totaling around 700-1400 calories. Nachos with ground beef reach 1603 calories, while loaded fries and fried pickles add crispy, flavorful indulgence. These items are perfect for those seeking hearty, satisfying meals, as detailed in the nutrition PDF.

4.2 Lower-Calorie Options: Salads and Grilled Choices

For lighter options, Willies Icehouse offers salads and grilled dishes. The House Salad has 70 calories, 3.64g fat, and 8.72g carbs, while grilled chicken provides lean protein. These choices cater to health-conscious diners, offering flavorful meals without excessive calories, as detailed in the nutrition PDF for mindful eating.

How to Download the Free Nutrition Information PDF

Access the free Willies Icehouse Nutrition Information PDF by visiting their official website. This resource provides detailed calorie, macronutrient, and allergen data, aiding health-conscious diners in making informed choices.

5.1 Step-by-Step Guide to Accessing the PDF Online

Visit Willies Grill and Icehouse’s website. Navigate to the Nutrition Information section. Click on the Download PDF link. The guide will open in your browser or download automatically. Review the detailed nutritional data, allergens, and menu item specifics to plan your meal wisely. This resource is designed to empower diners with transparency and convenience.

5.2 Benefits of Using the PDF for Meal Planning

The PDF provides detailed macronutrient breakdowns, allergen info, and calorie counts, enabling diners to align meals with dietary goals. It helps manage restrictions, supports healthier choices, and ensures transparency, making it an essential tool for mindful eating at Willies Icehouse.

Gluten-Free Menu Options at Willies Icehouse

Willies Icehouse offers gluten-free menu options, including lettuce wraps for burgers. While they accommodate dietary needs, note that cross-contamination may occur in shared kitchen spaces.

6.1 Detailed List of Gluten-Free Items and Their Nutrition Facts

Explore Willies Icehouse’s gluten-free options, including burgers with lettuce wraps and select sides. The nutrition information PDF provides detailed facts, such as calories, proteins, and carbs, helping guests make informed choices while managing dietary restrictions. This resource ensures transparency and supports a balanced dining experience for those with gluten-related needs.

6.2 Preparing Gluten-Free Orders: Safety and Cross-Contamination

Willies Icehouse takes precautions to minimize cross-contamination for gluten-free orders, though shared kitchen spaces pose risks. Staff is trained to handle special requests, and the nutrition information PDF outlines allergen details. Guests with severe gluten allergies should consult management to ensure safe preparation, balancing enjoyment with caution for a secure dining experience.

Seasonal Menu Items and Their Nutritional Impact

Willies Icehouse offers seasonal items like Hot Honey Chicken Sandwich and Chipotle Ribeye Nachos, which may be indulgent; The nutrition information PDF provides details on their calorie and macronutrient content, helping diners make mindful choices during limited-time offerings.

7.1 Nutritional Facts for Limited-Time Offers

Willies Icehouse’s seasonal items, like the Hot Honey Chicken Sandwich and Chipotle Ribeye Nachos, offer rich flavors but come with higher calorie counts. The nutrition information PDF reveals detailed macronutrients, such as calories, fats, and proteins, for these limited-time dishes, ensuring diners can balance indulgence with awareness of their dietary intake.

7.2 Balancing Indulgence with Nutritional Awareness

Willies Icehouse encourages diners to enjoy seasonal treats mindfully. By consulting the nutrition information PDF, guests can make informed choices, balancing indulgent items like nachos with lighter options, ensuring a delightful yet health-conscious dining experience that suits their preferences and goals;

Pricing and Nutritional Value: Is It Worth It?

Willies Icehouse offers competitively priced menu items, with detailed nutrition facts ensuring value for money. Their transparency helps diners assess cost versus nutrient content effectively.

8.1 Comparing Calories and Costs of Popular Items

Popular items like the Chicken Willie Sandwich, with 1219 calories, and Icehouse Queso, at 1266 calories, offer a calorie-dense dining experience. The free PDF provides detailed comparisons, enabling diners to evaluate cost versus nutritional value. While higher-calorie items may justify their pricing for some, others might find lower-calorie options more economical. Balancing taste and budget is made easier with this transparency.

8.2 Budget-Friendly Options That Align with Dietary Goals

Budget-conscious diners can opt for affordable options like the House Salad, priced around $5.99, with only 70 calories, or Fried Pickles at $5.99, offering a lower-calorie snack. These choices align with dietary goals while remaining cost-effective, making it easier to enjoy a satisfying meal without compromising on nutrition or budget.

Rewards and Free Menu Items for Health-Conscious Diners

Earn rewards for healthy choices and redeem points for free nutritious options, encouraging balanced meals while enjoying discounts and perks at Willies Icehouse.

9.1 Earning Rewards for Healthy Choices

Willies Icehouse rewards health-conscious diners through their loyalty program, offering points for every purchase. By choosing nutritious options, customers can accumulate points, which can be redeemed for free menu items. This initiative encourages patrons to make healthier choices while enjoying their favorite dishes, supported by the transparency of the nutrition information PDF.

9.2 Redeeming Points for Free Nutritious Options

Willies Icehouse rewards program allows customers to redeem earned points for free nutritious options, encouraging healthier choices. By downloading the nutrition information PDF, diners can identify low-calorie or gluten-free options to redeem, balancing indulgence with mindful eating while enjoying complimentary meals aligned with their dietary goals.

Willies Icehouse empowers diners with transparent nutrition information, enabling informed decisions that align with health goals. Downloading the PDF ensures mindful dining while savoring delicious meals.

10.1 Summarizing Key Nutritional Insights

The Willies Icehouse Nutrition Information PDF provides a comprehensive overview of menu items, detailing calories, macronutrients, and allergens. It highlights high-calorie options like wings and nachos, while also offering lower-calorie alternatives such as salads. This resource helps diners balance indulgence with nutritional awareness, ensuring informed choices that align with personal health and dietary goals.

10.2 Encouraging Mindful Dining for Better Health

Willies Icehouse supports mindful dining by providing clear nutritional insights, helping patrons enjoy their meals consciously. The free PDF guide empowers diners to make informed choices, fostering a balance between indulgence and health. By understanding nutritional content, customers can savor their selections thoughtfully, aligning their dining experiences with personal well-being and dietary aspirations.

student rewards and incentives.pdf

Student rewards and incentives are strategies used to motivate and encourage positive behavior, fostering academic and personal growth. They aim to create a supportive environment for learning and development.

1.1 Definition and Purpose of Rewards and Incentives

Rewards and incentives are tools designed to motivate students by recognizing their efforts and achievements. Rewards can be tangible (e.g., prizes, certificates) or intangible (e.g., praise, recognition). Incentives, on the other hand, are structured to encourage specific behaviors or outcomes. The primary purpose of these systems is to stimulate student engagement, improve behavior, and foster academic success, helping educators guide students toward their full potential.

1.2 The Role of Motivation in Student Behavior

Motivation plays a central role in shaping student behavior, driving them to act and engage in learning. It can be intrinsic (personal satisfaction) or extrinsic (rewards, recognition); Rewards and incentives are powerful motivators, encouraging effort and reinforcing positive actions. Without motivation, students may lack direction, making incentives essential for guiding behavior and fostering a productive educational environment, ultimately helping students achieve their academic and personal goals.

The Importance of Rewards in Education

Rewards are crucial in education as they improve student behavior, academic performance, and engagement. They reduce disruptive actions and encourage effort, creating a positive educational environment.

2.1 Improving Student Behavior and Academic Performance

Rewards significantly enhance student behavior by encouraging positive actions and reducing disruptions. They motivate students to focus on their studies, leading to improved academic performance and better educational outcomes.

Tangible rewards, such as prizes or certificates, and non-tangible ones, like praise, foster a sense of achievement. This recognition boosts students’ confidence, promoting a growth mindset and encouraging them to strive for excellence in their academic pursuits.

2.2 Enhancing Student Engagement and Participation

Rewards play a crucial role in increasing student engagement by making learning activities more appealing. They encourage active participation in class, fostering collaboration and creativity among students.

Both tangible and non-tangible incentives motivate students to take part in discussions and extracurricular activities, creating a dynamic and interactive learning environment that enhances overall educational experiences.

Types of Student Rewards and Incentives

Rewards can be categorized into tangible (e.g., prizes, certificates) and non-tangible (e.g., praise, recognition). Both types aim to encourage positive behavior and academic effort in students.

3.1 Tangible Rewards (e.g., Prizes, Certificates)

Tangible rewards, such as prizes or certificates, are physical items given to students to recognize achievements. These rewards are often used in schools to improve engagement and participation. They can be simple, like stickers or extra recess time, or more significant, such as trophies or gift cards. Tangible rewards provide clear, immediate recognition, motivating students to repeat positive behaviors. Their effectiveness lies in their visibility and appeal to students of all ages.

3.2 Non-Tangible Rewards (e.g., Praise, Recognition)

Non-tangible rewards, such as praise and recognition, are powerful motivators that foster student confidence and self-esteem. Verbal encouragement, public acknowledgment, and positive feedback are effective ways to reinforce desired behaviors. These rewards are cost-free and can be personalized, making them universally appealing. They encourage intrinsic motivation and create a positive classroom environment, promoting long-term engagement and accountability among students of all ages and backgrounds.

Designing Effective Reward Systems

Effective reward systems require clear goals, consistent criteria, and timely implementation to ensure fairness and transparency, fostering a positive and encouraging learning environment that benefits all students.

4.1 Setting Clear Goals and Criteria

Clear goals and criteria are essential for effective reward systems, ensuring students understand what is expected of them. This clarity fosters motivation and accountability, guiding behavior toward desired outcomes.

Well-defined standards prevent ambiguity, promoting fairness and consistency in reward distribution. Aligning goals with educational objectives ensures rewards reinforce meaningful achievements, encouraging students to strive for excellence and maintain engagement.

4.2 Timing and Frequency of Reward Distribution

The timing and frequency of rewards significantly impact their effectiveness. Immediate recognition of achievements reinforces desired behaviors, while delayed rewards may lose motivational impact. Consistency is key; regular distribution maintains engagement without overloading students. Balancing immediacy and consistency ensures rewards remain meaningful and motivating, fostering a culture of continuous improvement and sustained effort.

Cultural and Individual Differences in Incentives

Cultural and individual differences significantly influence the effectiveness of incentives. Recognizing these variations ensures rewards align with diverse values, preferences, and motivational needs, promoting equity and engagement.

5.1 Understanding Student Preferences

Understanding student preferences is key to designing effective incentives. Research shows that personalization enhances engagement, as students respond better to rewards aligned with their cultural values and individual interests. For instance, some prefer tangible rewards like certificates, while others value public recognition or peer acknowledgement. Recognizing these differences ensures incentives are meaningful and motivating across diverse student populations, fostering a more inclusive learning environment.

5.2 Adapting Rewards to Diverse Student Needs

Adapting rewards to meet diverse student needs is essential for inclusivity. Cultural differences influence preferences, with some students thriving on individual recognition and others excelling in group-based incentives. Tailoring rewards to accommodate varying abilities and backgrounds ensures equity. For example, offering choices like extra recess or academic privileges allows students to select what motivates them most, fostering a sense of autonomy and enhancing the effectiveness of the reward system.

The Impact of Rewards on Student Motivation

Rewards significantly influence student motivation by fostering engagement and encouraging effort. They enhance extrinsic motivation, driving students to achieve goals, while also nurturing intrinsic drive when balanced appropriately.

6.1 Positive Effects on Extrinsic Motivation

Rewards significantly enhance extrinsic motivation by providing students with tangible goals and recognition. This encourages effort and engagement, as students strive to earn prizes, certificates, or public acknowledgment. Competition-based incentives further amplify this effect, fostering a sense of achievement and accountability. Such external motivators effectively drive students to perform better academically and behaviorally, aligning their actions with desired outcomes.

6.2 Potential Negative Consequences

While rewards can motivate, overuse may lead to dependency, reducing intrinsic motivation. Students might focus solely on rewards rather than learning, undermining curiosity and creativity. Additionally, tangible rewards can diminish interest in tasks, creating a transactional mindset. Overemphasis on external incentives may also foster competition over collaboration and equity concerns, potentially harming the overall educational experience and student well-being.

Technology and Innovation in Reward Systems

Technology enhances reward systems through digital rewards, gamification, and data-driven tracking, enabling personalized incentives and real-time progress monitoring for students.

7.1 Digital Rewards and Gamification

Digital rewards and gamification are transforming traditional incentive systems by incorporating points, badges, and leaderboards. These tools create engaging experiences, motivating students to achieve goals. By leveraging technology, educators can offer personalized rewards, track progress, and foster healthy competition. Gamification also enhances participation, as students are driven by the excitement of earning digital accolades, making learning more interactive and fun. This approach aligns with modern preferences, ensuring rewards are relevant and impactful.

7.2 Using Data to Track and Reward Progress

Data-driven approaches enable educators to monitor student progress effectively, allowing for timely and personalized rewards. By analyzing performance metrics, teachers can identify achievements and areas needing improvement. Rewards tied to specific milestones motivate students to stay on track. This method ensures fairness and transparency, fostering a culture of accountability and continuous improvement. Regular assessments and feedback loops enhance the overall impact of incentive systems.

Teacher and Parental Involvement

Teachers and parents play a crucial role in implementing reward systems, ensuring consistency and support. Their collaboration fosters a positive environment, enhancing students’ motivation and behavior.

8.1 Collaborative Strategies for Implementation

Collaborative strategies involve teachers and parents working together to design and implement reward systems. Regular communication, shared goals, and mutual support ensure consistency. Teachers can share insights on student behavior, while parents can reinforce rewards at home. Strategies like interclass competitions or family reward charts encourage teamwork and accountability, fostering a unified approach to motivation and behavior improvement across environments.

8.2 Engaging Parents in Reward Systems

Engaging parents in reward systems enhances consistency between home and school. Strategies include involving parents in designing rewards, providing regular updates on their child’s progress, and encouraging participation in school activities. Parents can reinforce rewards at home, fostering a supportive environment. This collaboration strengthens student motivation and behavior, ensuring a cohesive approach to fostering positive outcomes for their children.

Challenges and Limitations

Challenges include overuse leading to dependency and fairness concerns. Balancing effectiveness with potential downsides is crucial for sustainable outcomes.

9.1 Overuse of Rewards and Dependency Issues

The overuse of rewards can lead to dependency, reducing intrinsic motivation. Students may focus solely on earning rewards rather than learning. Research indicates that excessive reliance on rewards can undermine self-determination, as students lose interest in tasks without incentives. Teachers must balance reward systems to avoid fostering dependency, ensuring motivation remains genuine and sustainable.

9.2 Ensuring Equity and Fairness

Ensuring equity and fairness in reward systems is crucial to avoid discrimination. Rewards should be accessible to all students, considering diverse needs and backgrounds. Clear criteria and transparent processes help maintain fairness, fostering an inclusive environment. Regular monitoring ensures that no student is disproportionately disadvantaged, promoting equality in opportunities and outcomes.

Best Practices for Implementing Reward Systems

Align rewards with clear goals, balance intrinsic motivation, and regularly assess effectiveness. Engage teachers and parents to ensure consistency and adapt systems to student needs.

10.1 Balancing Rewards with Intrinsic Motivation

Striking a balance between rewards and intrinsic motivation is crucial. While external incentives can drive behavior, they should not overshadow students’ innate desire to learn and grow. Research shows that overuse of rewards can diminish intrinsic motivation, leading to dependency. Therefore, educators should design systems that complement, rather than replace, internal drive, fostering a love for learning and self-improvement.

10.2 Monitoring and Evaluating Effectiveness

Regularly monitoring and evaluating the effectiveness of reward systems ensures they align with educational goals. Assessing student behavior, academic performance, and engagement helps gauge success. Feedback from students and educators provides insights for refinement. Ongoing evaluation allows for timely adjustments, ensuring rewards remain motivating and effective in fostering desired outcomes without undermining intrinsic motivation.

wow classic hardcore mage guide

WoW Classic Hardcore Mage offers a thrilling challenge, combining powerful spellcasting with survival mechanics. Frost Mages excel due to their defensive toolkit, making them ideal for cautious play.

Race Choices for Hardcore Mage

Optimal race choices enhance survivability and performance. Trolls (Horde) excel with Berserking, while Humans (Alliance) benefit from increased intellect and mana regeneration, making them top picks.

2.1 Best Horde Races for Mage

Trolls are the top choice for Horde Mages in WoW Classic Hardcore due to their Berserking ability, which increases casting speed during intense fights. This racial trait is invaluable for managing mana and survivability. Undead Mages also excel, benefiting from Will of the Forsaken, which provides immunity to fear and charm effects, enhancing control in dangerous situations. While Blood Elves offer Arcane Affinity, reducing spellcasting costs, they lack the immediate survival benefits of Trolls and Undead. Orcs, with Command, provide minor pet damage boosts but are less optimal for Mages. Trolls and Undead remain the most viable options for Hardcore Mage play.

2.2 Best Alliance Races for Mage

Gnomes and Humans are the top choices for Alliance Mages in WoW Classic Hardcore. Gnomes benefit from Explosive Sheep, which provides crowd control and area damage, while their passive mana regeneration enhances sustainability. Humans, on the other hand, gain Sword and Board, allowing them to equip shields for added defense, and Every Man for Himself, which removes movement impairing effects, boosting survivability. While Dwarves and Night Elves have unique traits, they lack the direct magical enhancements of Gnomes and Humans. Gnomes and Humans are optimal for their balance of offense, defense, and utility in Hardcore Mage play.

Professions for Hardcore Mage

Mining and Engineering are optimal for Hardcore Mages, offering safety and utility. Mining provides materials, while Engineering grants tools like bombs and gadgets for versatility and survival.

3.1 Mining and Engineering

Mining and Engineering are exceptional professions for Hardcore Mages, providing both utility and survival tools. Mining allows Mages to gather ores for crafting reagents and equipment, while Engineering offers gadgets like bombs and trinkets. These tools enhance survivability and add versatility to a Mage’s kit. Engineering’s devices, such as the Gnomish Cloaking Device, can aid in escaping dangerous situations, making it a crucial profession for safely navigating the game world. Together, Mining and Engineering create a well-rounded setup that supports both offense and defense, making them ideal for the Hardcore Mage playstyle.

3.2 Other Profession Options

Beyond Mining and Engineering, Mages can explore other professions for unique benefits. Tailoring allows crafting cloth armor and bags, reducing reliance on vendors. Enchanting enables powerful weapon and armor enchants, boosting survivability and damage output. Herbalism provides ingredients for potions, aiding mana and health sustainability. While these professions may not offer the same survival tools as Engineering, they enhance a Mage’s overall versatility and self-sufficiency. Tailoring and Enchanting are particularly useful for optimizing gear, while Herbalism supports potion dependency, making them solid alternatives for Mages seeking different playstyles or resource management strategies in WoW Classic Hardcore.

Talent Builds for Hardcore Mage

Frost, Fire, and Arcane are the primary Mage specs, each offering unique strengths. Frost excels in survival, Fire in burst damage, and Arcane in mana efficiency.

4.1 Frost Mage Build

The Frost Mage build is tailored for survival, making it ideal for WoW Classic Hardcore. Key talents include Frostbite, which slows enemies, and Ice Block, allowing temporary invulnerability. This build emphasizes crowd control and defensive capabilities, with Winter’s Chill enhancing Frost damage. Players prioritize spellcasting efficiency and mana conservation, ensuring longevity in dangerous situations. Frost’s toolkit, including slows and roots, provides exceptional escape mechanisms, making it a top choice for cautious play. This build is particularly effective in solo play and challenging content, where survivability is paramount.

4.2 Fire Mage Build

The Fire Mage build focuses on dealing massive damage through high burst potential, making it a viable option for WoW Classic Hardcore. Key talents like Pyroblast and Combustion amplify spell damage, while Ignite provides consistent damage over time. However, Fire Mages are more fragile due to higher mana consumption and lack of defensive tools compared to Frost. To mitigate risks, players must rely on precise timing, strategic cooldowns, and careful positioning. This build excels in PvE content but requires cautious play in PvP scenarios to avoid unnecessary deaths. The Fire Mage’s high damage output makes it a rewarding choice for experienced players willing to manage its inherent risks.

4.3 Arcane Mage Build

The Arcane Mage build emphasizes high mana efficiency and burst damage through mastery of arcane spells. Key talents like Arcane Intellect and Arcane Power enhance magical abilities, while Clearcasting reduces spell costs. This build excels at dealing consistent, high-damage bursts and is ideal for players who prioritize mana management. However, Arcane Mages lack some of the survival tools available to Frost Mages, making them riskier in Hardcore mode. Despite this, their ability to cast Teleport and Polymorph provides utility. Arcane Mages are best suited for experienced players who can manage their mana effectively and avoid dangerous situations. This build shines in PvE but requires careful play in PvP scenarios.

Gear Progression for Hardcore Mage

Gear progression is vital for a WoW Classic Hardcore Mage, focusing on intellect, spell damage, and stamina. Early on, prioritize items like Mage’s Hat and Woolen Robe for intellect. As you level, seek dungeon drops such as Robes of the Lich from Scholomance and Robes of the Guardian from Onyxia. Epic items like Robes of the Archmage and Staff of the Verflame (from Deadmines) are crucial for later stages. Enchant your gear with Spell Damage and Intellect to maximize effectiveness. Crafting or acquiring these pieces ensures optimal performance in both PvE and PvP scenarios, while maintaining survivability in Hardcore mode.

Tips and Tricks for Hardcore Mage

Mastering a WoW Classic Hardcore Mage requires precision and caution; Always prioritize defensive spells like Frost Nova and Ice Block to avoid unnecessary damage. Use Blink strategically to escape dangerous situations or reposition quickly. Crowd control is key—Polymorph and Counterspell can save you from multiple enemies. Manage your mana carefully, as running out can be deadly. Utilize conjured food and water to avoid downtime. When soloing, pull single enemies and avoid patrols. In groups, focus on controlling adds and maintaining a safe distance. Lastly, always keep an eye on your surroundings to anticipate threats before they escalate.

Strengths and Weaknesses of Hardcore Mage

The WoW Classic Hardcore Mage excels with strong defensive tools like Frost Nova, Ice Block, and Blink, making survival easier. Their ability to kite enemies and control crowds is unparalleled. High burst damage and mana efficiency add to their versatility. However, Mages are fragile with low health and armor, making them vulnerable to melee attacks. Reliance on mana can be a downfall if not managed properly. In PvP, Mages are highly susceptible to attacks and lack strong healing options. Despite these weaknesses, their toolkit and damage output make them a powerful choice for skilled players willing to adapt and play cautiously.

Survival Strategies for Hardcore Mage

Mastering survival as a Hardcore Mage requires utilizing Frost Nova, Ice Block, and Blink effectively. Always maintain distance, use kiting strategies, and manage aggro to stay alive in challenging situations.

8.1 Managing Aggro

Managing aggro is crucial for a Hardcore Mage, as unnecessary threat can lead to dire consequences. Use spells like Frost Nova and Counterspell to control enemy focus. Avoid using high-damage spells during low health. Utilize Blink to create distance and reset aggro. Always prioritize kiting over standing still, as mobility is key. Ensure you have a clear escape route and be prepared to use defensive cooldowns like Ice Block when overwhelmed. Proper aggro management ensures survival and allows for seamless progression in both PvE and PvP scenarios.

8.2 Emergency Escape Techniques

Emergency escape techniques are vital for a Hardcore Mage’s survival. Mastering spells like Blink and Ice Block can save you from deadly situations. Blink allows instantaneous teleportation, creating distance from enemies, while Ice Block freezes you in place, making you invulnerable and resetting aggro. Combine these with Frost Nova to root enemies and gain time to escape. Always pre-plan escape routes and use line of sight to lose pursuers. Utilize Teleport and Portal spells to quickly relocate if needed. These tools, when used strategically, ensure you can evade danger and live to cast another day in WoW Classic Hardcore.

PvE Guide for Hardcore Mage

Frost Mages excel in PvE due to their exceptional crowd control and damage output. Use Frost Nova and Counterspell to manage adds effectively. In dungeons, focus on single-target spells like Frostbolt and Ice Lance for consistent damage. Always prioritize mana management, using Evocation when needed. For soloing, rely on Teleport and Portal to minimize travel time and avoid unnecessary risks. Gear progression should focus on intellect and stamina to enhance survivability. Engineering and Mining professions provide additional safety tools, making PvE content more manageable. By mastering these strategies, a Hardcore Mage can efficiently progress through WoW Classic’s challenging PvE content while maintaining a high level of safety.

PvP Guide for Hardcore Mage

In PvP, Frost Mages shine with their exceptional control and burst damage. Use Frost Nova and Counterspell to disrupt opponents, while Ice Block provides a crucial escape tool. Teleportation spells like Blink and Teleport are vital for positioning and avoiding enemies. Focus on kiting melee classes with Frostbolt and Ice Lance, and use Cone of Cold to slow multiple targets. In battlegrounds, prioritize mana management and target healers first. Gear with intellect and stamina is ideal for survivability. While Mages are powerful in PvP, they are vulnerable to melee gaps, so play cautiously and rely on your toolkit to outsmart opponents and secure victories in WoW Classic Hardcore PvP scenarios.

Advanced Tips and Tricks for Hardcore Mage

Mastering a Hardcore Mage requires precision and situational awareness. Optimize your spell rotation to maximize mana efficiency, especially in prolonged fights. Use Frost Nova and Counterspell to control aggressive enemies. Pre-plan your route and resurrection points to minimize downtime after deaths. Invest in gear with high intellect and stamina for survivability. Experiment with kiting techniques, using Frostbolt and Ice Lance to maintain distance from melee attackers. Utilize Teleport and Hearthstone strategically to avoid dangerous areas. Practice timing your Ice Block for emergency situations, such as avoiding fatal spells or traps. These advanced strategies will elevate your gameplay and ensure longevity in WoW Classic Hardcore.

lettering guide template

Lettering guide templates are essential tools for achieving precise, consistent lettering in various creative and technical projects. They help ensure uniformity and readability, making them invaluable for drafters, artists, and designers. These guides, like the Ames Lettering Guide, provide structured layouts for perfect letter formation, enhancing professionalism and efficiency in both traditional and digital workflows.

1.1 Understanding the Purpose of Lettering Guides

Lettering guides are designed to ensure consistency, readability, and professionalism in lettering. They provide structured layouts for precise letter formation, helping users maintain uniformity in size, spacing, and style. Whether for drafting, calligraphy, or sign-making, these tools enhance accuracy and efficiency, making them indispensable for achieving high-quality results in both creative and technical applications.

1.2 Importance of Consistency in Lettering

Consistency in lettering is crucial for ensuring readability and professional appearance. Uniform lettering enhances clarity, making text easier to read and understand. Inconsistent lettering can lead to confusion and a lack of professionalism. By maintaining consistent lettering, creators can convey their message effectively, whether in technical drawings, artistic designs, or everyday writing, ensuring a polished and cohesive final product.

What is an Ames Lettering Guide?

The Ames Lettering Guide is a tool used by drafters to create straight, aligned lines for lettering on blueprints. It’s affordable, durable, and ensures consistent lettering accuracy.

2.1 Overview of the Ames Lettering Guide

The Ames Lettering Guide is a practical tool designed for drafters and artists to create precise, straight lines for lettering on blueprints and designs. Made from durable materials, it ensures consistent and professional results. Its compact design and affordability make it a long-lasting essential in both traditional and modern drafting processes. Easy to use, it enhances the quality and readability of lettering in various projects.

2.2 Features and Benefits of the Ames Guide

The Ames Lettering Guide is an affordable, durable tool designed for precise lettering. Priced around $4, it offers exceptional value, lasting indefinitely with proper care. Its compact design ensures portability, while its structured layout promotes consistent, professional results. Ideal for drafters and artists, it enhances readability and efficiency in various projects, making it an indispensable asset for achieving high-quality lettering effortlessly.

Choosing the Right Lettering Template

Selecting the right lettering template involves evaluating your project requirements, desired style, and tools. Consider durability, affordability, and design flexibility to ensure the template meets your creative or technical needs effectively.

3.1 Factors to Consider When Selecting a Template

When choosing a lettering template, consider project requirements, budget, and desired outcomes. Assess the template’s flexibility, durability, and compatibility with your tools. Evaluate its alignment with your lettering style and the level of customization needed. Ensure it suits your skill level and the specific task at hand to achieve optimal results.

3.2 Popular Types of Lettering Templates

Popular types of lettering templates include the Ames Lettering Guide, known for its durability and affordability, and style-specific templates for calligraphy, script, or modern fonts. Digital templates offer versatility, while custom guides allow personalization. These tools cater to various needs, ensuring precise lettering in drafting, art, and design projects, adapting to both traditional and modern creative workflows.

How to Use a Lettering Guide Effectively

Align the guide with your writing surface, secure it firmly, and trace letters evenly. Use a pencil first, then ink, and adjust the guide for consistency.

4.1 Step-by-Step Guide to Using Lettering Templates

Start by preparing your workspace and aligning the template with your writing surface. Secure the guide firmly to prevent shifting. Trace the letters lightly with a pencil, following the template’s guidelines. Once satisfied, ink over the pencil marks. Adjust the template as needed for different letter sizes or styles. Use the Ames Lettering Guide for precise alignment and consistency in your work.

4.2 Tips for Achieving Professional Results

For professional lettering, ensure precise alignment using guides like the Ames Lettering Guide. Maintain consistent spacing and letter size. Practice regularly to refine your technique. Use high-quality tools and ink for crisp lines. Customize templates to fit your style while keeping the design clean. Double-check your work for errors and adjust as needed to achieve polished, professional-looking results every time.

Customizing Your Lettering Template

Customizing lettering templates allows for personalization, enabling unique designs. Modify spacing, fonts, and layouts to suit projects. Add artistic flourishes or align with brand styles for professional results.

5.1 Modifying Templates to Suit Your Needs

Modify lettering templates by adjusting spacing, font styles, and alignment to match specific project requirements. Personalize by adding unique flourishes or adapting to brand guidelines. Use digital tools for precise edits or manually tweak traditional guides for a custom fit, ensuring consistency and enhancing visual appeal in your designs or blueprints.

5.2 Adding Personal Touches to Your Lettering

Add personal touches by experimenting with custom fonts, flourishes, or unique lettering styles. Incorporate brand colors or creative flourishes to make your designs stand out. Use digital tools or hand-drawn elements to infuse personality while maintaining readability. Personalization enhances visual appeal and ensures your lettering reflects your artistic vision or brand identity, making it truly distinctive and engaging.

Examples of Lettering Guide Templates

The Ames Lettering Guide is a popular example, offering precise lettering for blueprints and technical documents. Its low cost and durability make it a favorite among drafters and designers, ensuring professional results consistently.

6.1 Sample Templates for Different Lettering Styles

Sample templates cater to various lettering styles, from elegant calligraphy to modern handwriting. The Ames Lettering Guide is a classic example, ideal for technical drafts. Other templates include script fonts for artistic projects and sans-serif styles for professional documents. These guides ensure consistency, whether for creative designs or precise technical applications, making them versatile tools for drafters and designers alike.

6.2 Case Studies of Successful Lettering Projects

Successful lettering projects often rely on templates for consistency and precision. For instance, the Ames Lettering Guide has been instrumental in architectural drafting, ensuring uniform lettering on blueprints. Similarly, branding campaigns use custom templates to maintain brand identity across materials. These case studies highlight how lettering guides enable professionals to achieve professional, error-free results in diverse applications, from technical drawings to creative designs.

Best Practices for Lettering

Use lettering guides for consistent spacing and alignment. Plan your layout beforehand to avoid errors. Maintain uniform letter size and style throughout your work for professionalism.

7.1 Essential Techniques for Clean and Readable Lettering

For clean lettering, use guides to ensure consistent spacing and alignment. Plan your layout to avoid overcrowding. Maintain uniform letter size and style throughout. Use sharp tools or fine-tip pens for crisp lines. Practice letterforms to achieve smooth, even strokes. Regularly review and adjust your work for clarity and professionalism. These techniques enhance readability and visual appeal in any project.

7.2 Avoiding Common Mistakes in Lettering

Common mistakes include inconsistent spacing, uneven letter alignment, and poor tool selection. To avoid these, use a lettering guide for precision and practice letterforms regularly. Ensure proper spacing by planning layouts in advance. Select tools that suit your project, like fine-tip pens for detail or brushes for bold styles. Regular review and correction help maintain professionalism and clarity.

The Role of Lettering Guides in Modern Design

Lettering guides remain essential in modern design, ensuring precision and consistency in typography. They bridge traditional craftsmanship with digital tools, offering versatility for artists and designers alike.

8.1 Evolution of Lettering Tools and Techniques

From traditional metal guides like the Ames Lettering Guide to modern digital software, lettering tools have evolved significantly. Digital templates now offer precision, customization, and efficiency, blending time-honored techniques with contemporary design needs, ensuring lettering remains a vital skill in both analog and digital creative processes.

8.2 Impact of Digital Tools on Traditional Lettering Guides

Digital tools have transformed traditional lettering guides, offering greater versatility and accessibility. While physical guides like the Ames Lettering Guide remain popular for their tactile accuracy, digital templates enable rapid customization and scalability; This blend of old and new ensures that lettering guides adapt to modern design demands, maintaining their relevance in both creative and technical applications.

Where to Find Reliable Lettering Templates

Online marketplaces, stationery stores, and digital tool websites offer reliable lettering templates. The Ames Guide is available at craft stores, while design software provides customizable options online.

9.1 Recommended Resources for Lettering Guides

Online marketplaces like Etsy and Amazon offer a variety of lettering templates. Specialty craft stores and art suppliers also provide high-quality guides. Additionally, graphic design websites and software platforms like Adobe and Canva offer customizable digital templates. For traditional tools, the Ames Lettering Guide is widely available at drafting supply stores and online retailers, ensuring accessibility for both professionals and hobbyists.

9.2 How to Evaluate the Quality of a Template

Evaluate a template by assessing its alignment accuracy, spacing consistency, and material durability. Look for customization options, such as adjustable spacing and letter size. Ensure the guide is easy to use and adaptable to different mediums, like paper or digital tools. High-quality templates should enhance precision and readability, making them suitable for professional and creative projects. Check user reviews for reliability and satisfaction.

Creating Your Own Lettering Guide

Designing a custom lettering guide involves selecting durable materials, ensuring precise measurements, and incorporating adjustable features for versatility. Start by sketching your template, then cut and refine it for accurate letter alignment and spacing. Test the guide on various surfaces to ensure functionality and make adjustments as needed for optimal performance in your projects.

10.1 Steps to Design a Custom Lettering Template

Start by planning your template’s size and layout, ensuring it suits your project’s needs. Sketch the design on durable material, like plastic or metal, using precise measurements. Carefully cut out the lettering guides, refining edges for smooth tracing. Test the template on various surfaces to ensure accuracy and make adjustments for consistent results. Sand or file rough edges for safety and longevity.

10.2 Tools and Materials Needed for DIY Guides

Sturdy material like plastic or metal is ideal for durability. Use a craft knife or scissors for precise cuts. A ruler or straightedge ensures straight lines, while a pencil marks guidelines. Sandpaper smooths rough edges, and a cutting mat protects work surfaces. Optional tools include a laser cutter for intricate designs and a file for refining details.

Advanced Techniques with Lettering Guides

Advanced techniques involve combining traditional lettering methods with digital tools for intricate designs. These methods enhance precision and creativity, allowing for complex layouts and alignment while maintaining consistency in projects.

11.1 Exploring Complex Lettering Styles and Designs

Exploring complex lettering styles involves experimenting with intricate designs, such as script, gothic, and modern calligraphy. Lettering guides enable precise alignment and spacing, making it easier to create visually striking layouts. From blackletter script to contemporary fonts, these tools help artists achieve professional results while maintaining creativity and consistency in their work.

11.2 Incorporating Lettering Guides into Larger Projects

Incorporating lettering guides into larger projects enhances creativity and consistency. They are widely used in drafting blueprints, designing marketing materials, and creating artistic compositions. By ensuring precise lettering, these tools help maintain a professional appearance, making them indispensable for projects requiring clarity and visual appeal across various industries and applications.

Lettering guides remain indispensable tools, blending tradition with modern design needs. Their versatility ensures continued relevance, supporting creators in achieving precise, professional results across various mediums and industries.

12.1 Summarizing the Value of Lettering Templates

Lettering templates offer unparalleled consistency, ensuring precise and professional results. They streamline workflows, reduce errors, and enhance readability. Versatile for both traditional and digital projects, these guides are cost-effective tools, providing lasting value for creators. Their ability to adapt to various styles and mediums solidifies their importance in modern design, making them indispensable for achieving polished, high-quality lettering.

12.2 Emerging Trends in Lettering and Guide Design

Modern lettering guides are evolving with digital tools, offering customizable templates and interactive features. AI-powered design assistants are becoming popular, enabling precise lettering with minimal effort. The integration of augmented reality and real-time editing tools is reshaping traditional techniques, making lettering more accessible and dynamic. These innovations ensure lettering guides remain relevant in the digital age, blending artistry with technology seamlessly.

tens machine user guide

A TENS machine, short for Transcutaneous Electrical Nerve Stimulation, is a non-invasive pain relief device. It delivers electrical impulses through electrodes to disrupt pain signals to the brain, offering a drug-free, user-friendly solution for managing various types of pain effectively.

What is a TENS Machine?

A TENS (Transcutaneous Electrical Nerve Stimulation) machine is a portable, non-invasive medical device that relieves pain by delivering low-voltage electrical impulses through electrodes placed on the skin. These impulses interrupt pain signals to the brain, reducing discomfort. It’s a drug-free alternative for managing chronic or acute pain, suitable for conditions like back pain, arthritis, or muscle soreness. Easy to use, TENS machines are a popular choice for home pain relief, offering adjustable settings for personalized therapy.

A Brief History of TENS Technology

The origins of TENS technology trace back to ancient civilizations using electrical fish for pain relief. Modern TENS emerged in the 1960s, building on Melzack and Wall’s gate control theory of pain. Early devices were bulky and limited, but advancements in electronics miniaturized and improved them. Today, TENS machines are portable, user-friendly, and widely used for pain management, reflecting decades of innovation in medical technology.

Components of a TENS Machine

A TENS machine includes a main unit, electrodes, lead wires, and a battery. These components work together to deliver controlled electrical impulses for pain relief.

Main Unit and Controls

The main unit of a TENS machine is the central control hub, housing the electronic circuitry and user interface. It features adjustment dials or buttons for setting intensity, mode, and duration. Many units include a digital display screen for easy parameter visualization. Common controls allow users to toggle between modes like Burst, Pulse, or Modulated settings. Advanced models may offer preset programs for specific pain types or timers for treatment sessions. Proper use of controls ensures effective and safe operation.

Electrodes and Lead Wires

Electrodes are adhesive pads attached to the skin, while lead wires connect them to the main unit. Ensure electrodes are placed on clean, dry skin for optimal conductivity. Avoid placing them near open wounds or sensitive areas. Lead wires should be checked for damage before use. Replace electrodes periodically to maintain adhesion and effectiveness. Proper handling and storage of both components are essential for longevity and performance of the TENS machine.

Battery and Power Supply

The TENS machine operates on a 9V alkaline or rechargeable battery. Ensure the battery is inserted correctly, following the polarity indicators. Avoid mixing battery types for optimal performance. Regularly check battery life, as low power may reduce effectiveness. Replace or recharge the battery when the machine indicates low voltage. Turn off the device when not in use to conserve energy. Proper battery maintenance ensures consistent and reliable operation of the TENS machine.

Safety Precautions and Contraindications

Avoid using TENS machines near water, on broken skin, or with a pacemaker. Pregnancy, epilepsy, and certain medical conditions may contraindicate its use. Always consult a healthcare professional before use to ensure safety and proper application.

When Not to Use a TENS Machine

Avoid using a TENS machine during pregnancy, as its safety is not established. Do not use it near water, on open wounds, or if you have a pacemaker. Individuals with epilepsy or certain medical conditions should avoid TENS therapy. Additionally, refrain from using it on the neck or chest area to prevent unintended nerve stimulation. Always consult a healthcare professional before use, especially if you have underlying health issues or are unsure about its safety for your condition.

Warnings and Cautions

Avoid using a TENS machine near water or while bathing to prevent electric shock. Do not use it during pregnancy or if you have a pacemaker. Keep it away from open wounds or sensitive areas. Never place electrodes on the neck or chest, as this may interfere with vital functions. Use caution if you have epilepsy or heart conditions. Always follow the instruction manual and consult a healthcare professional if unsure. Clean the device with mild soap and water; avoid chemical cleaners to maintain its functionality.

Preparing for Use

Start by reading the instruction manual to understand the device. Check the battery level and ensure electrodes are clean and securely attached. Prepare the skin area for electrode placement by cleaning it with mild soap and water. Verify all components are in working order before proceeding to ensure safe and effective use of the TENS machine.

Reading the Instruction Manual

Reading the instruction manual is essential before using a TENS machine. It provides detailed guidance on safe operation, contraindications, and proper techniques. Pay attention to electrode placement, intensity settings, and treatment duration. Familiarize yourself with the device’s controls and parameters to ensure optimal pain relief. Always follow the manufacturer’s guidelines to avoid adverse effects. If unsure about any aspect, consult a healthcare professional for clarification. Proper understanding of the manual ensures effective and safe use of the TENS machine for pain management.

Checking the Battery

Before using the TENS machine, always check the battery to ensure it is fully charged or replaced with a fresh one. Insert a 9V alkaline or rechargeable battery, following the correct polarity. Avoid mixing old and new batteries or using damaged ones. If the machine has a rechargeable option, charge it as per the manual. Regularly inspect the battery compartment for corrosion. A low battery may cause inconsistent performance, so monitor the device’s power level before each use to maintain effective pain relief.

Preparing the Electrodes

Preparing the electrodes is crucial for effective TENS therapy. Begin by inspecting the pads for wear or damage. Clean them with mild soap and water, then rinse thoroughly. Allow them to air dry to ensure proper adhesion. If using reusable electrodes, ensure they are free from residue. Peel the protective film just before application and avoid touching the conductive side to prevent oil from your skin interfering with adherence. Properly prepared electrodes ensure optimal conductivity and comfort during treatment.

Placing the Electrodes

Place electrodes on or near the pain area, ensuring clean, dry skin for optimal adhesion. Follow professional guidelines or manufacturer instructions for proper placement to maximize effectiveness.

Identifying Pain Areas

Locate the pain source by gently pressing the affected area to pinpoint discomfort. Use electrode placement guides or consult a professional for accurate positioning. Place electrodes around the pain site, avoiding direct placement on sensitive areas like joints or bony prominences. Ensure electrodes are not placed near the face, neck, or over open wounds. Adjust electrode positions if discomfort or skin irritation occurs. Always avoid using TENS machines near water or on individuals with certain medical conditions, as specified in the manual.

Proper Placement Techniques

Place electrodes on or near the pain area, ensuring they form a pair for optimal current flow. Avoid positioning on joints, bony prominences, or sensitive areas like the face or neck. Use electrode gel for better adhesion and stability. Ensure electrodes are not near water or on individuals with pacemakers or certain medical conditions. Follow guidelines in the manual for specific placements, such as avoiding the carotid sinus or broken skin. Always adjust intensity to a comfortable level after placement.

Operating the TENS Machine

Operating a TENS machine involves setting parameters, applying electrodes, and adjusting intensity. Follow the manual for guidance on modes, timer, and pulse settings for safe, effective use.

Starting the Machine

Begin by reading the instruction manual to understand the machine’s operation. Ensure the battery is fully charged or inserted correctly; Place the electrodes on the skin as guided, then turn on the device. Start with the lowest intensity setting and gradually increase until a comfortable sensation is felt. Always follow the manufacturer’s guidelines for safe and effective use. Proper initialization ensures optimal pain relief and prevents any potential discomfort or device malfunction.

Adjusting Settings and Intensity

Start with the lowest intensity setting and gradually increase until a comfortable tingling sensation is achieved. Use the control buttons to adjust intensity levels, ensuring the sensation remains pleasant. Experiment with different modes, such as burst or pulse, to find what works best for your pain. Regularly monitor the treatment and tweak settings as needed for optimal relief. Always refer to the manual for specific guidance on adjusting your machine’s settings effectively.

Monitoring and Adjusting Treatment

Regularly monitor the treatment’s effectiveness and adjust as needed. Check electrode placement and ensure proper skin contact to maintain consistent stimulation. If discomfort arises, reduce intensity or reposition electrodes. Periodically assess pain levels and adjust settings, such as mode or pulse width, for better relief. Ensure the device is functioning correctly and within recommended guidelines. If issues arise, consult the manual or contact a professional for assistance. Adjustments should always prioritize comfort and effectiveness.

Maintenance and Care

Regularly clean the machine with a soft cloth and mild detergent. Store the device in a dry place, away from extreme temperatures. Replace worn-out electrodes to ensure optimal performance and avoid skin irritation. Always follow the manufacturer’s guidelines for proper care and maintenance to extend the device’s lifespan and reliability.

Cleaning the Machine

To maintain your TENS machine, use a soft, damp cloth to wipe the main unit, avoiding harsh chemicals or abrasive agents. Gently remove any dirt or residue. Allow the machine to air dry completely before storing or using it again. For the electrode leads, clean them with a mild soap solution and rinse thoroughly. Regular cleaning ensures optimal performance and longevity of the device, while preventing any potential skin irritation during use.

Storing the Device

Always turn off your TENS machine and remove the batteries before storing it. Place the device in a protective case or pouch to prevent damage. Store it in a cool, dry environment, away from direct sunlight and extreme temperatures. Avoid exposing it to moisture or humidity. Ensure all electrodes are securely stored in their packaging to maintain adhesion. Regularly check the expiration dates of electrodes and replace them as needed to ensure optimal performance when in use.

Troubleshooting Common Issues

If the TENS machine does not turn on, check the battery for proper installation and charge. Weak or inconsistent stimulation may indicate faulty electrodes or poor placement. Ensure electrodes are securely attached and positioned correctly. If skin irritation occurs, discontinue use and consult a professional. For device malfunctions, refer to the user manual or contact the manufacturer. Regularly inspect lead wires and electrodes for damage, replacing them as needed to maintain optimal functionality and user safety during treatment sessions.

Additional Considerations

Consult a professional for severe or complex pain cases. Combine TENS with physiotherapy or medication under medical guidance. Always follow manufacturer guidelines for optimal results and safety.

When to Consult a Professional

Consult a professional if experiencing severe or persistent pain, or if unsure about TENS usage. Seek advice for conditions like pregnancy or central origin pain. Professionals can guide electrode placement and settings for optimal relief. If pain persists despite proper use, medical evaluation is recommended. Always follow professional guidelines for safe and effective TENS therapy. Consulting a healthcare provider ensures personalized treatment and avoids potential risks.

Combining with Other Therapies

TENS can be effectively combined with other therapies like physical therapy, massage, or acupuncture for enhanced pain relief. It works well alongside exercises and heat or cold therapy. However, always consult a professional before integrating TENS with other treatments. This ensures safety and maximizes benefits. Combining therapies can offer a comprehensive approach to managing pain and improving overall well-being. Proper guidance is key to achieving the best results without adverse interactions.

A TENS machine is a versatile tool for pain relief, offering convenience and effectiveness. Always follow guidelines for safe use and consult professionals for personalized advice.

Final Tips for Effective Use

For optimal results, always place electrodes on clean, dry skin near the pain area. Start with low intensity and gradually increase as needed. Ensure proper electrode placement and follow the user manual for specific settings. Regularly clean and store the device to maintain functionality. Consult a healthcare professional if pain persists or worsens. Consistent use and adherence to guidelines will enhance the effectiveness of your TENS machine experience.

The Importance of Consistency

Consistency is key to maximizing the benefits of a TENS machine. Regular, repeated sessions help maintain pain relief and prevent discomfort from recurring. Always follow the recommended usage guidelines and maintain proper electrode placement for optimal results. By incorporating the TENS machine into your daily routine, you can achieve consistent pain management and improve overall well-being. Avoid irregular use, as it may reduce effectiveness. Consistency ensures the device works efficiently, providing long-term relief and enhancing your quality of life.